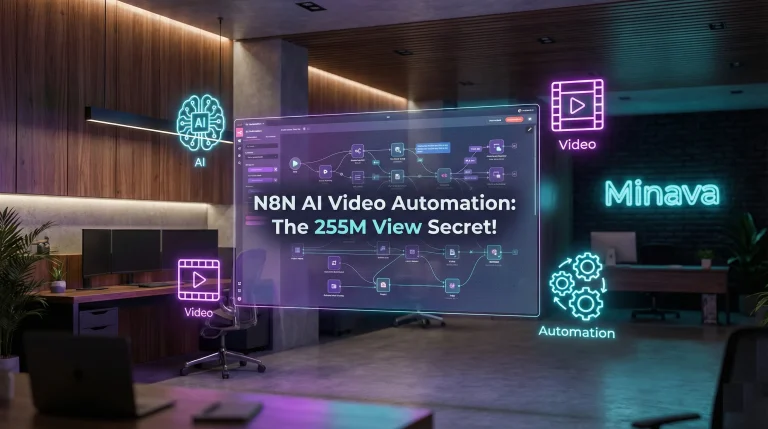
Ever scrolled through Instagram and stumbled upon a page like “If Only,” with its mind-bending AI videos and over a million followers? What if I told you that its viral content, racking up a staggering 255 million views, is created almost entirely by an automated AI agent? It sounds like science fiction, but it’s happening right now. This incredible feat showcases the power of combining human creativity with smart automation. Welcome to the world of N8N AI video automation, a game-changer for content creators. Here at Minava.org, we’re all about empowering you with the latest AI tools, and today, we’re pulling back the curtain on how you can build your very own automatic video creation robot.
The core idea is to create stunning POV (Point-of-View) videos—the kind that makes you feel like you’re a Viking warrior or a prince in ancient Rome. These videos are incredibly engaging because they put the viewer directly into the action. While you could create them manually, the real power lies in automation. This guide will walk you through setting up an N8N AI video workflow that takes a simple idea and turns it into a finished video, ready for the world to see.
What is an N8N AI Video Workflow?
Think of it as building a digital assembly line for your video content. You provide a single input (your video idea), and a series of connected tools automatically perform every step, from generating visuals to producing the final video file. N8N is a powerful, open-source workflow automation tool that acts as the “brain” of our operation. It connects different apps and services through their APIs, allowing us to automate video creation N8N style, without needing to be a coding genius. Ready to build your own viral content machine?
How to Automate Video Creation with N8N: A Step-by-Step Guide
We’re going to build a workflow that takes a text prompt, creates an image with DALL-E, and then animates it into a video using RunwayML. Let’s dive in!
-
Step 1: The Trigger – Your Big Idea
Every automated process needs a starting point. In N8N, we’ll begin with a simple form. This is where you’ll input your video concept.
- Node: Manual Trigger / Form
- Setup: Create a form with a single text field labeled something like “Today’s Video Idea.” This will be our `userInput`.
- Example Idea: “A POV shot of a motorcyclist driving on a mountain road surrounded by cherry blossom trees in Japan.”
-
Step 2: From Words to a Picture (OpenAI DALL-E 3)
Next, we send our idea to an AI image generator. We’ll use OpenAI’s DALL-E 3 model for this, as it’s great at interpreting detailed prompts.
- Node: OpenAI
- Action: Generate Image
- Authentication: You’ll need an OpenAI API key.
- Prompt Engineering: Don’t just send the raw idea! To get the best results for our N8N AI video automation, we’ll enhance the prompt. We’ll prepend text like: “Photorealistic, POV, cinematic shot, rider’s gloves visible on handlebars, 8k resolution, detailed…” and then append our `userInput`. This gives the AI much better direction.
-
Step 3: Translating the Image for the Next Step
APIs often need data in specific formats. To send our newly created image to the video generator, we first need to convert it into a text format called a Base64 string. It sounds technical, but N8N makes it easy.
- Node: Move Binary Data
- Action: Convert the image file from the OpenAI node into a Base64 string. This is a crucial, though simple, step in our N8N AI video workflow.
-
Step 4: The Magic of Motion (RunwayML API)
This is where our static image comes to life. We’ll use the powerful RunwayML platform, which can animate images into short video clips. Since there isn’t a dedicated Runway node in N8N (yet!), we use a universal tool.
- Node: HTTP Request
- Method: POST (we are *sending* data to Runway)
- URL: You’ll get this from the RunwayML API documentation. It will be an endpoint for generating videos.
- Authentication: You’ll need to add a custom header with your RunwayML API key for authorization.
- Body (JSON): Here, you’ll specify the model you want to use (e.g., `gen-3`), the image dimensions, and most importantly, you’ll insert the Base64 image data from the previous step.
-
Step 5: A Moment of Patience (The Wait Node)
AI video generation isn’t instant. It can take a minute or two. We need to tell our workflow to pause before trying to fetch the result, otherwise, it will fail. A simple Wait node is perfect for this.
- Node: Wait
- Duration: Set it to 60-90 seconds. This gives RunwayML enough time to work its magic.
-
Step 6: Retrieving Your Video Masterpiece
Once the wait is over, it’s time to collect our video. We’ll use another HTTP Request, this time to *get* the finished file.
- Node: HTTP Request
- Method: GET (we are *retrieving* data)
- URL: The URL will use the unique task ID that RunwayML gave us back in Step 4.
- Output: This node will return a direct link to your final MP4 video file. Success!
-
Step 7: Delivery!
The final step is to do something with the video. For now, let’s just have the robot email it to us.
- Node: Gmail / Send Email
- Recipient: Your email address.
- Subject: “Your New AI Video is Ready!”
- Body: Insert the video link from the previous step.
And that’s it! You’ve just designed a complete N8N AI video automation pipeline. You can run this workflow, type in “An astronaut walking on the moon with a flag next to him,” and a few minutes later, a video will land in your inbox. For those looking to take automation even further, you could explore how to build an AI Telegram bot with no code to trigger these workflows on the go!
Why Automate Video Creation with N8N?
You might be wondering if this is all worth the effort. Absolutely! Here’s why this approach is so powerful:
- Scalability: Create dozens of unique videos in the time it would take to make one manually.
- Consistency: Maintain a consistent style and quality across all your content.
- Creativity Unleashed: Spend your time thinking of creative ideas, not getting bogged down in the technical process.
- Endless Possibilities: You can expand this workflow to automatically add music, generate captions, or even post directly to social media platforms like Instagram and YouTube. This is similar to leveraging AI tools for automating dropshipping tasks, but for creative content.
Wrapping It Up: Your Turn to Be the Creator
We’ve journeyed from a simple idea to a fully automated video creation system. The power of N8N AI video automation is that it democratizes content creation, putting tools once reserved for big studios into the hands of individual creators like you. This workflow is just a starting point. You can swap out DALL-E for Midjourney, Runway for other video tools, and add steps to post directly to your channels. The future of content is automated, and you’re now equipped to be a part of it.
This is just one example of what’s possible when you combine different AI services. If you’re inspired by this, you should definitely check out our guide on how to deploy an AI-generated app to see how far you can take these concepts.
What kind of videos will you create with your new automation superpower? Drop a comment below with your ideas or questions! If you found this guide helpful, please share it with other aspiring creators.
Frequently Asked Questions (FAQ)
1. What is N8N and is it better than alternatives like Zapier or Make?
N8N is a workflow automation tool that lets you connect different applications and services. Unlike many cloud-only platforms, N8N is source-available, meaning you can self-host it for more control and potentially lower costs. While “better” is subjective, N8N is often praised by developers and power-users for its flexibility, powerful logic nodes (like IF statements and loops), and more generous free tier, especially when self-hosted. For a complex N8N AI video workflow like this one, its flexibility is a huge advantage.
2. Do I need to know how to code to build this N8N AI video automation?
No, you do not need to be a programmer! That’s the beauty of N8N. It uses a visual, node-based interface where you drag and drop components. While understanding basic concepts like APIs and JSON is helpful (especially for the HTTP Request node), you’re not writing code from scratch. The video and this guide show you exactly which settings and data to use.
3. What other AI tools can I integrate into an N8N video workflow?
The possibilities are vast! You can integrate a wide range of tools. For image generation, you could use Midjourney or Stable Diffusion. For video, you could explore tools like Pika Labs or Luma AI once their APIs become more accessible. For audio, you could use ElevenLabs to generate a voiceover or Suno AI for background music. Any tool with an API can potentially be plugged into your N8N AI video automation workflow.
4. How much does it cost to run a workflow like this?
The cost has two main components. First is N8N itself, which can be free if you self-host it, or you can use their paid cloud plans. Second, and more significantly, are the API costs of the services you use. OpenAI (for DALL-E) and RunwayML both charge based on usage. A single video might cost a few cents. For example, generating one DALL-E 3 image might be around $0.04, and a few seconds of Runway video generation might cost around $0.05-$0.10 per second of footage. It’s affordable for experimentation but can add up if you’re generating hundreds of videos.